Planting a Year’s Worth of Garlic
Garlic is one of the easiest garden plants you can grow. If you’re only going to grow a small assortment of produce, I highly recommend growing at least a few heads. In fact, I’ve grown a year’s worth in a 4ft x 6ft garden bed back when we had a tiny lot in town!
If you haven’t planted your garlic yet don’t worry! Just the other day I planted our 2022 crop. As long as you get it in before the ground freezes you’ll be good. (Though one year I didn’t and was out there for hours with a screwdriver chiseling away at the ground to plant. We still got a good harvest, though I wouldn’t recommend waiting that long.)
(None of the links in this post are affiliate links. Any products linked are only because I use and like them.)
Choosing Garlic

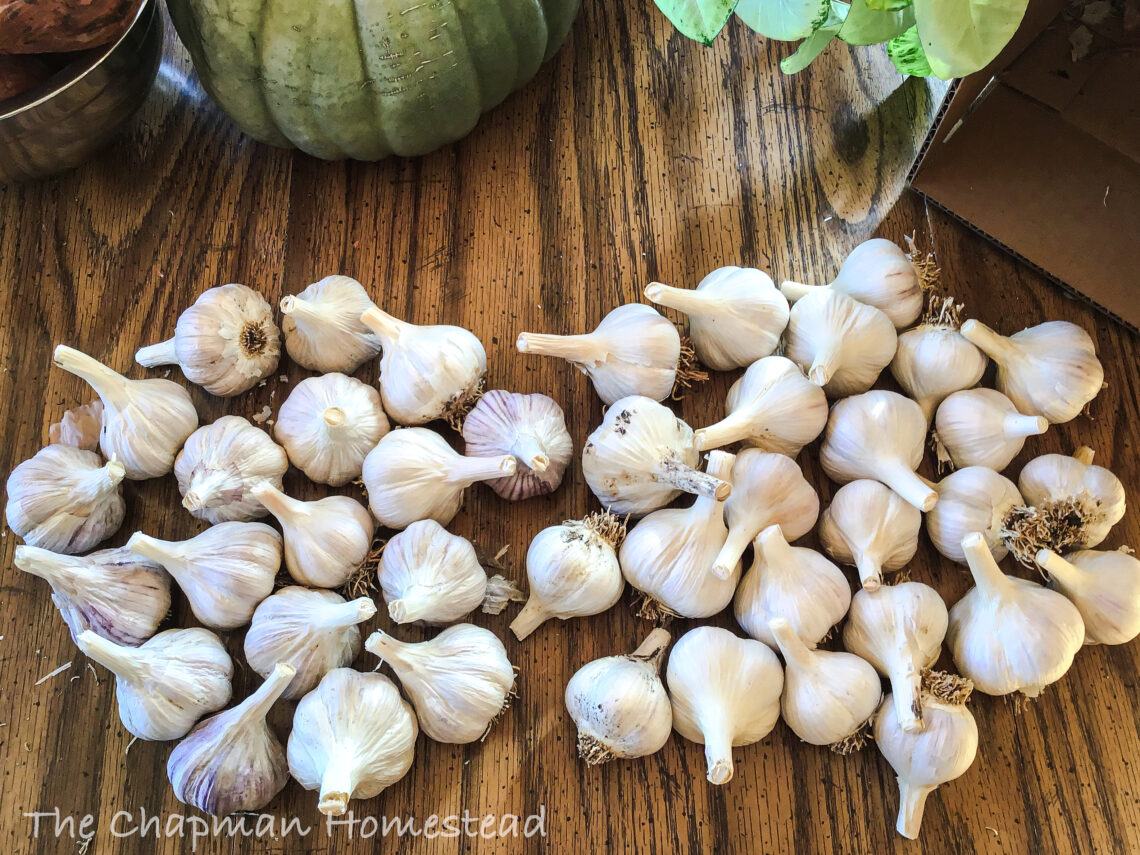
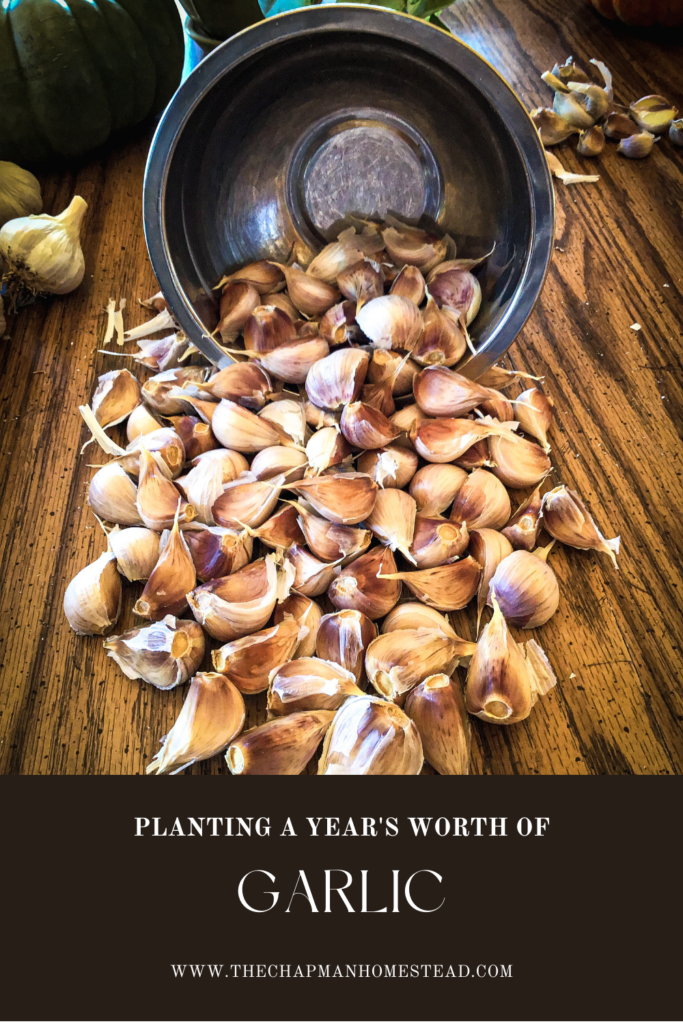
You’ll want to break each head into individual cloves. Each clove will grow a full head of garlic by next July!
There are two different kinds of garlic: hard neck and soft neck. You can braid soft neck garlic and it has more cloves that are smaller. This is the kind of garlic usually available at the grocery store. Hard neck garlic has cloves growing around a central stem. It tends to have fever, but larger, cloves and has a stronger flavor. Hard neck garlic also seems to do better in colder, harsher climates and can last in storage up to a year.
This year we harvested enough garlic that I was able to set aside 2 lbs 11.4 oz of garlic to plant. Both varieties I planted are hard neck varieties. My favorite is Music, which I lasts until the next garlic harvest. If we don’t eat it all before then!
If this is your first time growing garlic, buy heads from a reputable company. I have always had good luck with garlic from Territorial Seed Company. Many options are sold out at this point, but some are still available. You can also purchase organic garlic from the grocery store as a last resort. Whatever you do, don’t buy conventional garlic to plant. It is sprayed with a growth inhibiter to keep it from sprouting.
Prepping The Garlic Bed
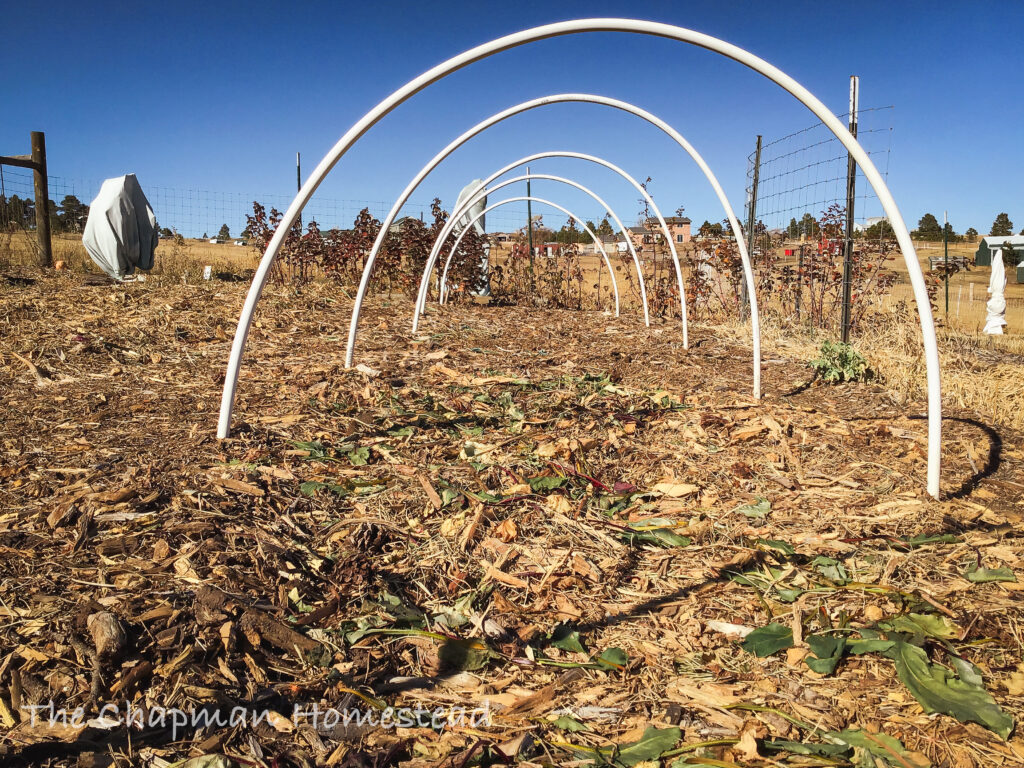
The first thing I did was clean out the garlic bed. After harvesting this year’s garlic, I grew a late crop of beets. It also had a layer of wood chip mulch that needed to be pulled back.
Garlic will grow bigger, more robust heads in good soil. Last year, I amended my garlic bed with composted horse manure before planting. This year, I didn’t add any more composted manure. However, I did add some amendments after planting.
Once I had all the mulch pulled back and the weeds pulled out I made furrows to plant the garlic in. The furrows were about two inches deep and about 10 inches apart. I don’t really measure any more, but you want your garlic to have space to grow a nice big bulb.
Additionally, garlic needs to be planted at least 5 inches deep. Since I added some coop clean out and a nice thick layer of mulch on top I didn’t have to worry about not planting deep enough.
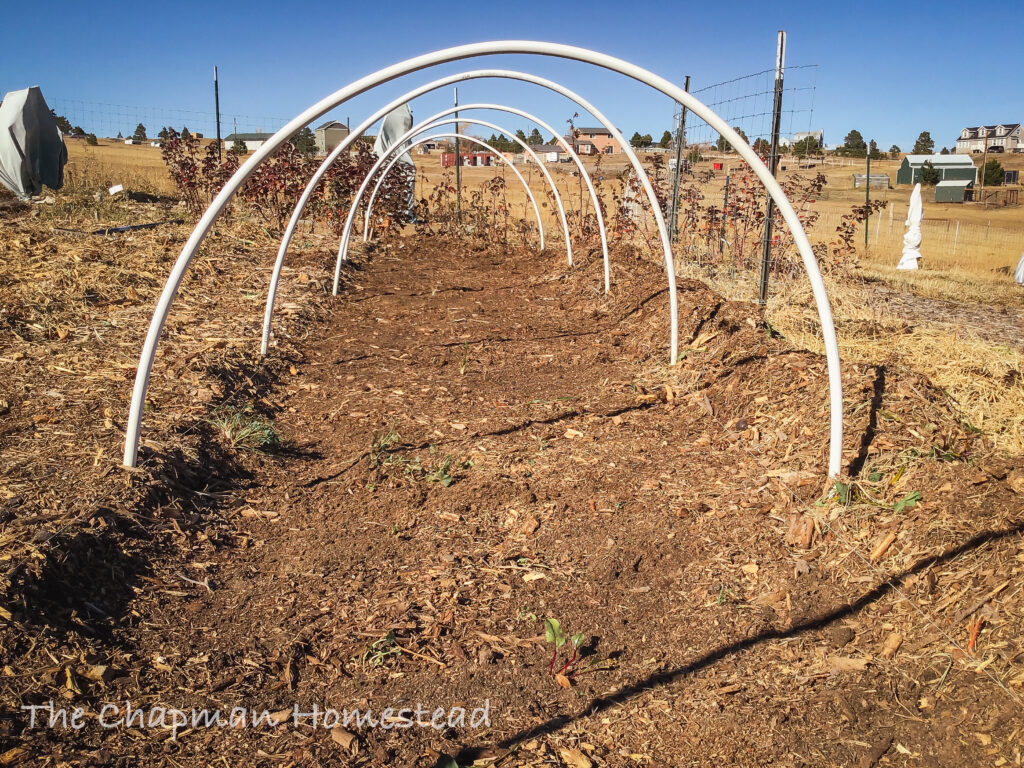
Planting the Garlic
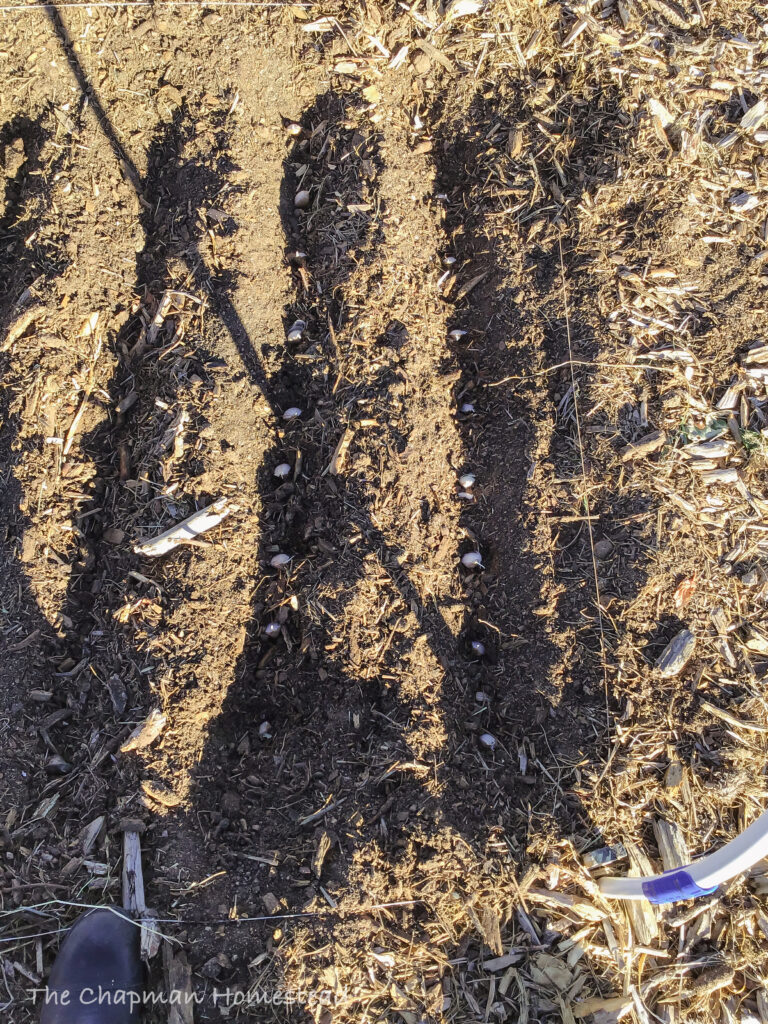
Next, it was time to plant. I planted the individual cloves, point side up, about 4 to 6 inches apart. Any more I just eyeball the spacing; I could fit about nine or ten cloves in each 4ft row. It’s important to make sure that the point is up so that the roots have an easy time growing down. Yes, nature will find a way, but your garlic will grow better if you help nature out.
After planting the cloves, I covered them back over with dirt.
The bed I planted in is 4ft wide by 22 ft long. I had enough garlic to plant 18 feet with garlic. I wanted a whole 22ft bed, but also want enough garlic to eat until August 2022. Next Year I might have to purchase some more garlic.

In the extra space I planted 16 shallots from this year’s harvest. Shallots need to be spaced out about a foot on center and like to have their necks above the soil level. Otherwise, I did the same thing for them as for the garlic.
Amending the Bed
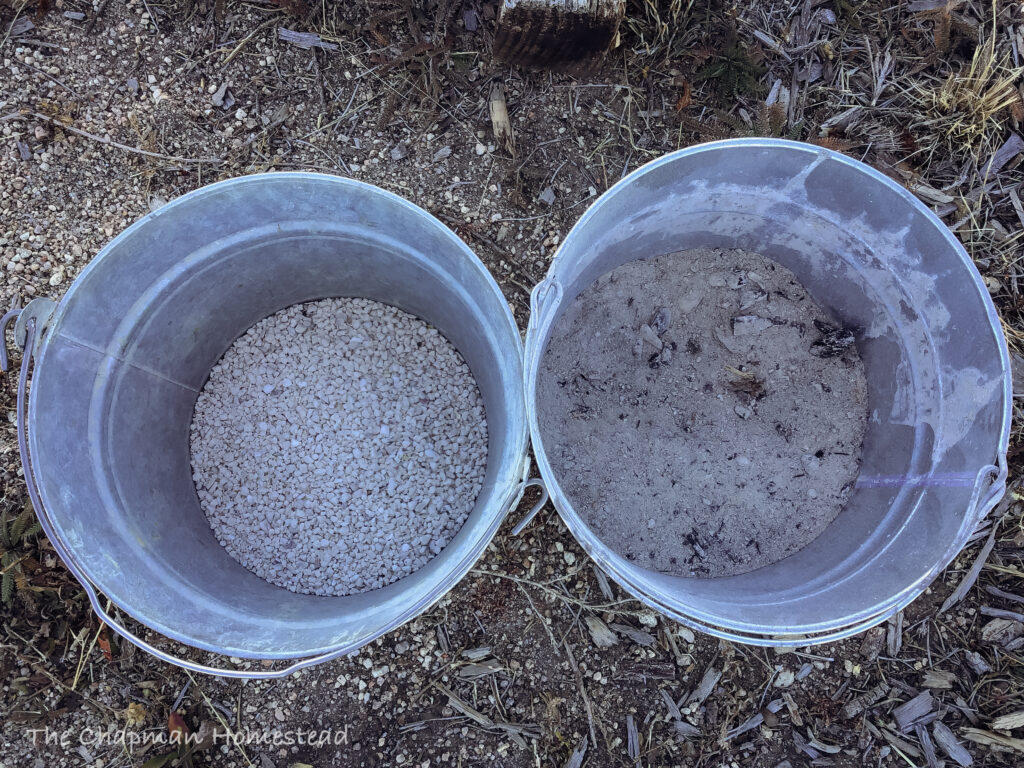
While I didn’t add any composted manure to the bed this year, I did add some amendments after planting. Bulbing plants like to have extra calcium and phosphorus in their soil, so I stole some of my flock’s oyster shell to sprinkle on top. Oyster shell will help add both to the soil. I also added a light dusting of wood ash from our wood stove. Wood ash helps add calcium and potassium as well as some phosphorus, zinc, copper, and magnesium.
Then, I added a 1/2 inch to 1 inch layer of fresh chicken bedding from cleaning out the hen house. Usually you should not put fresh bedding directly on the garden. However, it is not mixed into the soil, and since it will sit for at least 9 months before harvest, it’s not a problem. I did this last year as well and my garlic bulbs were quite big. Finally, I raked the mulch back over the bed and added more on top for a layer of mulch at least 4 inches thick if not more. (Apparently I forgot to photograph that.)

That’s it. Unless we have minimal snow and no rain I will not water these at all between now and harvest in mid to late July 2022. If I do a liquid fertilizer on the whole garden I’ll get the garlic too, but I won’t go out of may way to water or feed them.
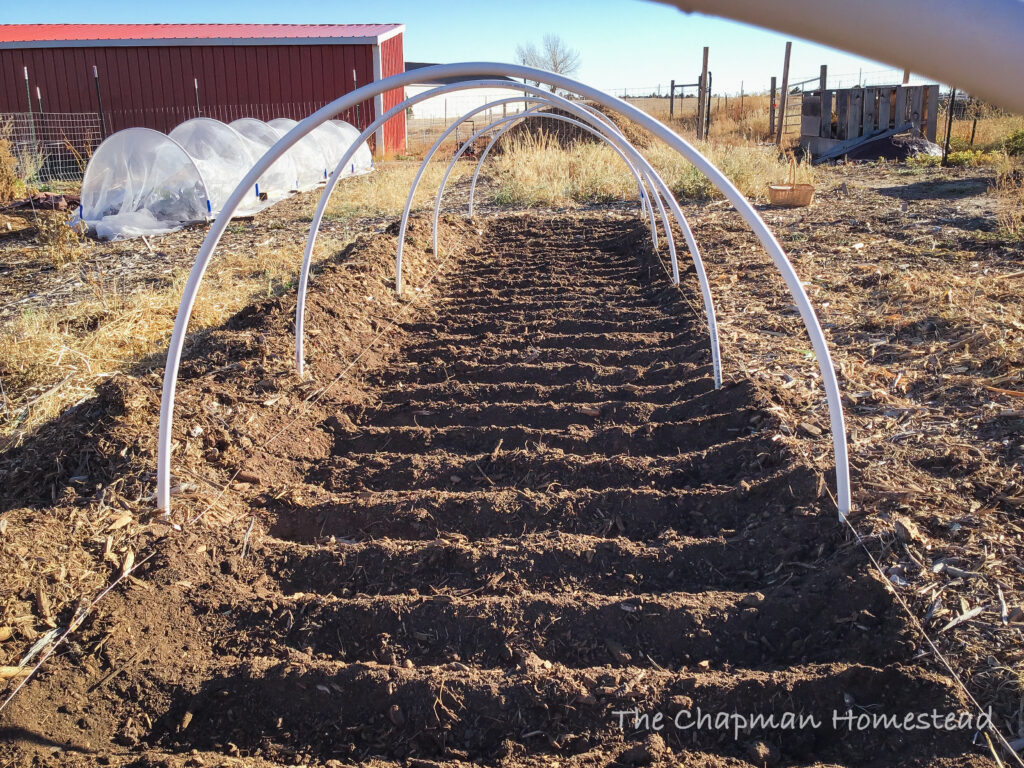
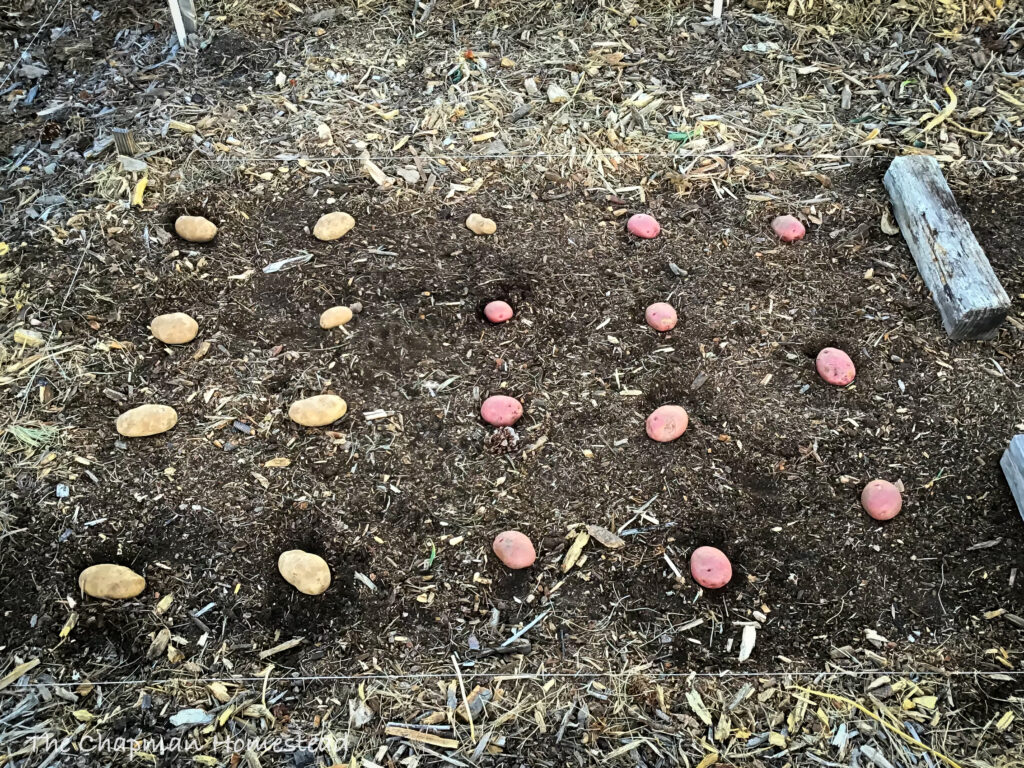
Potato Experiment (Not the electric kind!)
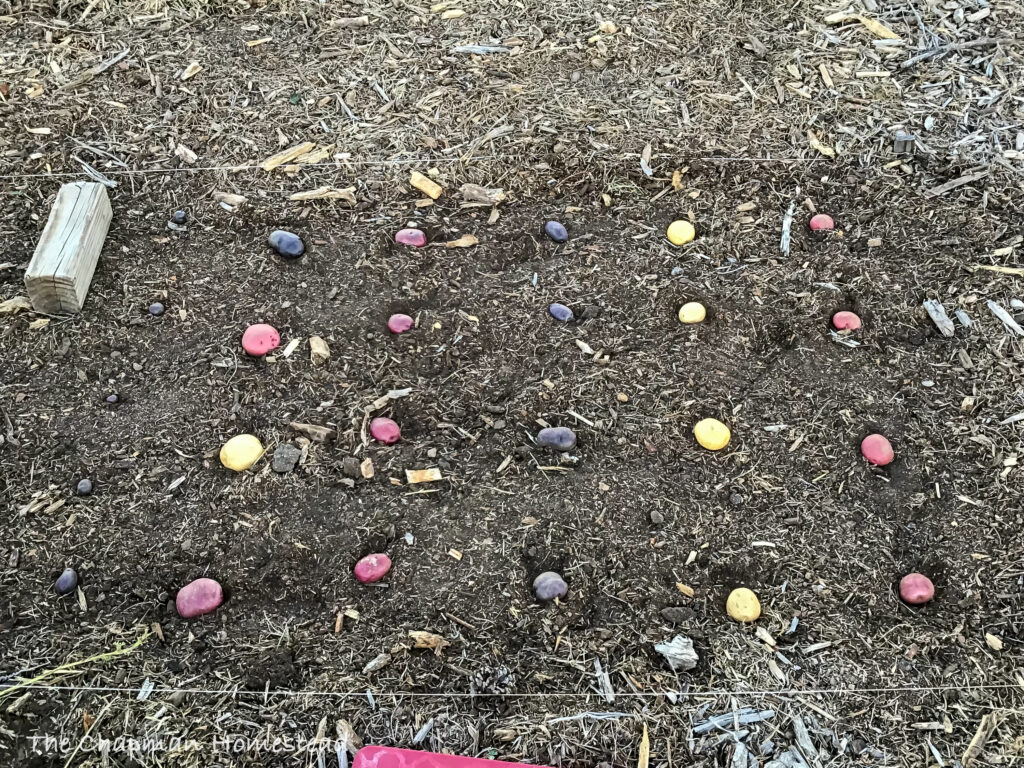
I also planted some potatoes as an experiment in the next bed over. This year we got an amazing harvest from just a few of the overwintered, volunteer potatoes in these beds. The volunteer potatoes actually seemed more robust than the spring planted potatoes, despite being lack luster the previous year. So I figured why not try a bed of fall planted potatoes?
Since I don’t know what the results will be, I only planted a tiny selection of our own potatoes from this year. The rest I planted were organic from the grocery store. These are WAY cheaper than certified seed potatoes, so if they all rot it’s not a huge loss.
I dug down a little in the dirt to plant them before giving them the same treatment as the garlic. This past spring, I planted potatoes on top of the dirt covered by 6-8 inches of wood chip mulch. They did great and were much cleaner and easier to harvest. However, I figured I should give these spuds as much of a fighting chance against winter cold as I could. These will also get no water now or until harvest unless it’s incredibly dry.
(And CO is an arid state, so it’s already pretty dry. However, I have yet to have to water garlic or potatoes more than once or twice a season even in the driest years.)
Hopefully come next year I’ll have some exciting updates on both the garlic and the potato experiment!
Did you find this post useful? Pin it to refer to later or to share with others!


One Comment
Pingback: