Getting Ready for Ducklings – Setting up the Brooder
Now that you’ve created a water catchment system, and built your brooder, it’s time to prepare your brooder for ducklings.
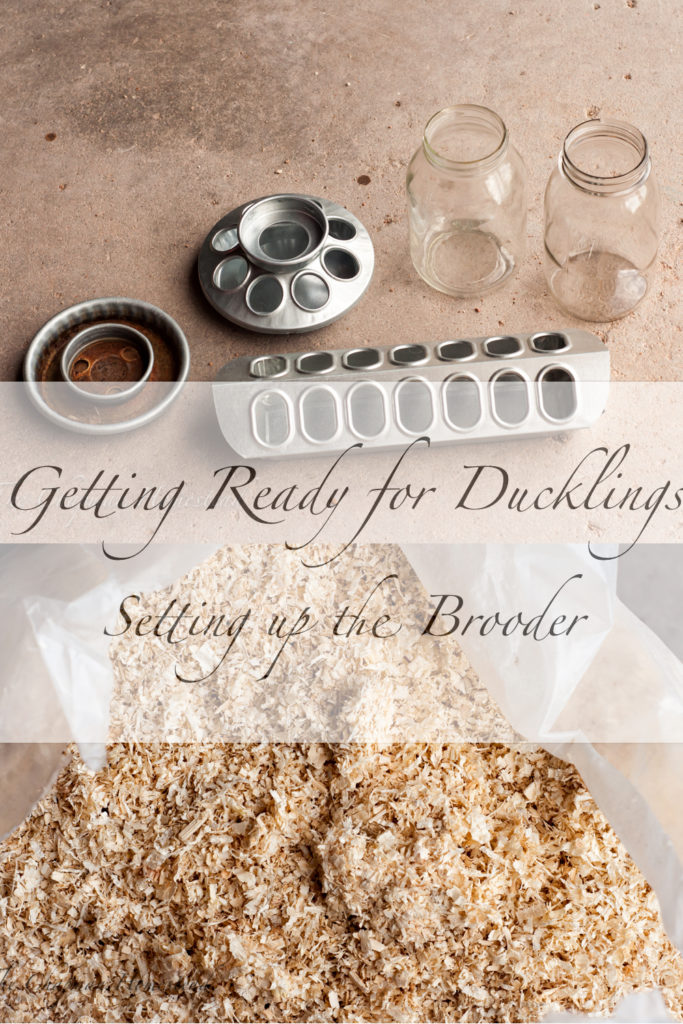
Setting up your brooder is easy! There are only a few things you’ll need:
- Bedding
- Containers for food and water
- A heat source to keep your babies warm
*Though not required, you can also add extra items like a mirror or other toys to keep them busy.
Brooder Bedding
There are two main types of bedding to choose from for your brooder, straw or pine shavings. Both can be purchased from your local farm store and cost about the same amount. Some people also use sand or paper, but this post will focus on these two main types
Straw
There are several reasons you may want to use straw in your brooder.
First, straw doesn’t create a lot of dust. This is especially nice if your brooder is inside your house, as baby birds can kick up a surprising amount of bedding. This problem is obviously worse with baby chicks, but there was still a thick layer of dust on everything when the ducks and geese moved outside.
Second, depending on where you live, straw may be cheaper for the amount you get.
Third, it composts down fairly well. (If you’re not already composting, it’s time to start!)
There are some downsides to straw as well. In my experience, straw is not incredibly absorbent. This might not be too much of a problem if you are brooding baby chicks, but duckling and gosling poop is much more watery. Damp bedding can lead to health problems for your chicks, not to mention it stinks. Additionally, straw can be hard for new babies to walk around it.
We use straw in our duck coop, but not in our brooder.
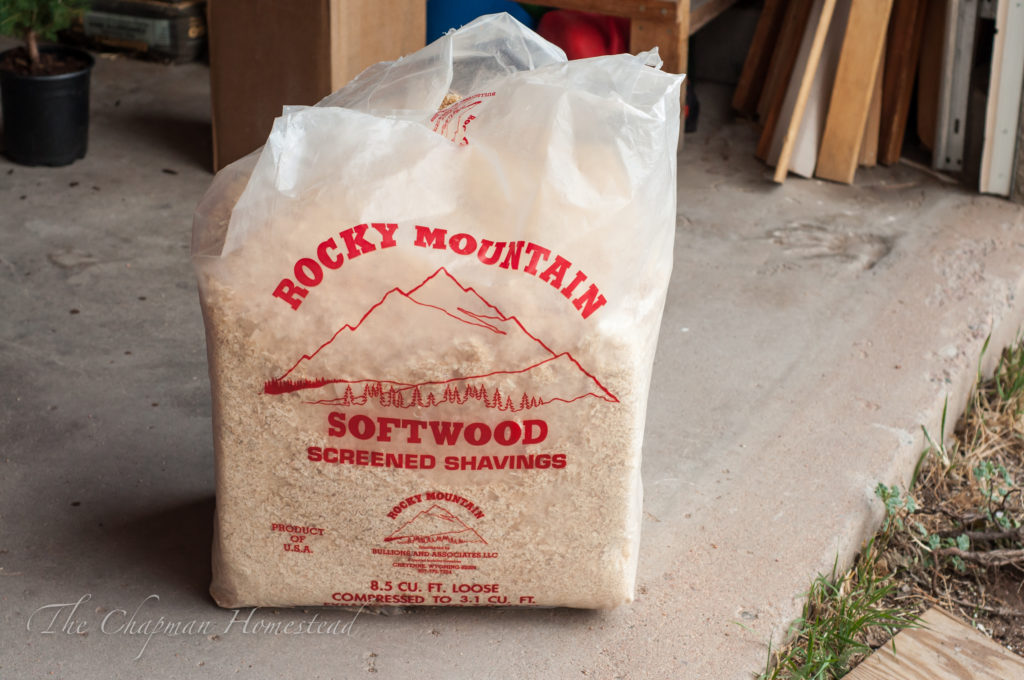
Pine Shavings
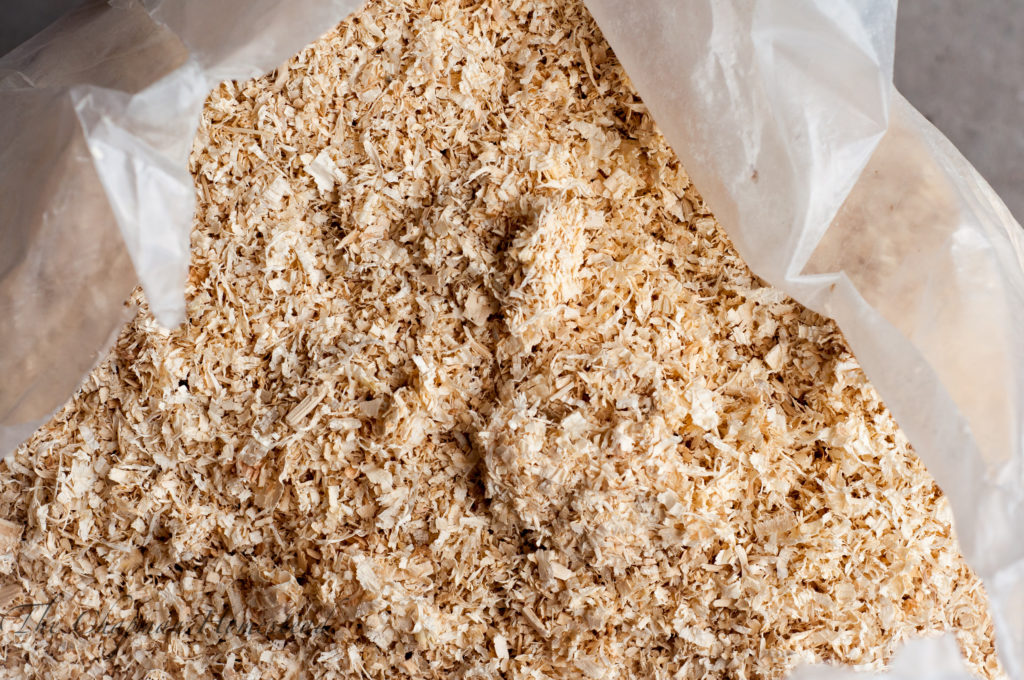
We use pine shavings any time that we brood baby fowl. From what I can tell, pine shavings seem to be the most popular bedding choice for raising baby birds in the homesteading community. And for good reason. They tend to absorb moisture better, they are easier for baby birds to walk on, and they compost down fairly quickly.
The biggest downside when it comes to using pine shavings is the dust. IT GETS EVERYWHERE! Remember that thick layer of dust I told you about removing? Pine shavings are the culprit.
However, I have found that pine shavings make spot cleaning the brooder easy. This is incredibly important in making sure your brooder doesn’t stink to high heaven.
For the brooder make sure you use fine shavings instead of large flakes, and never use cedar shavings for birds.
Food and Water Containers
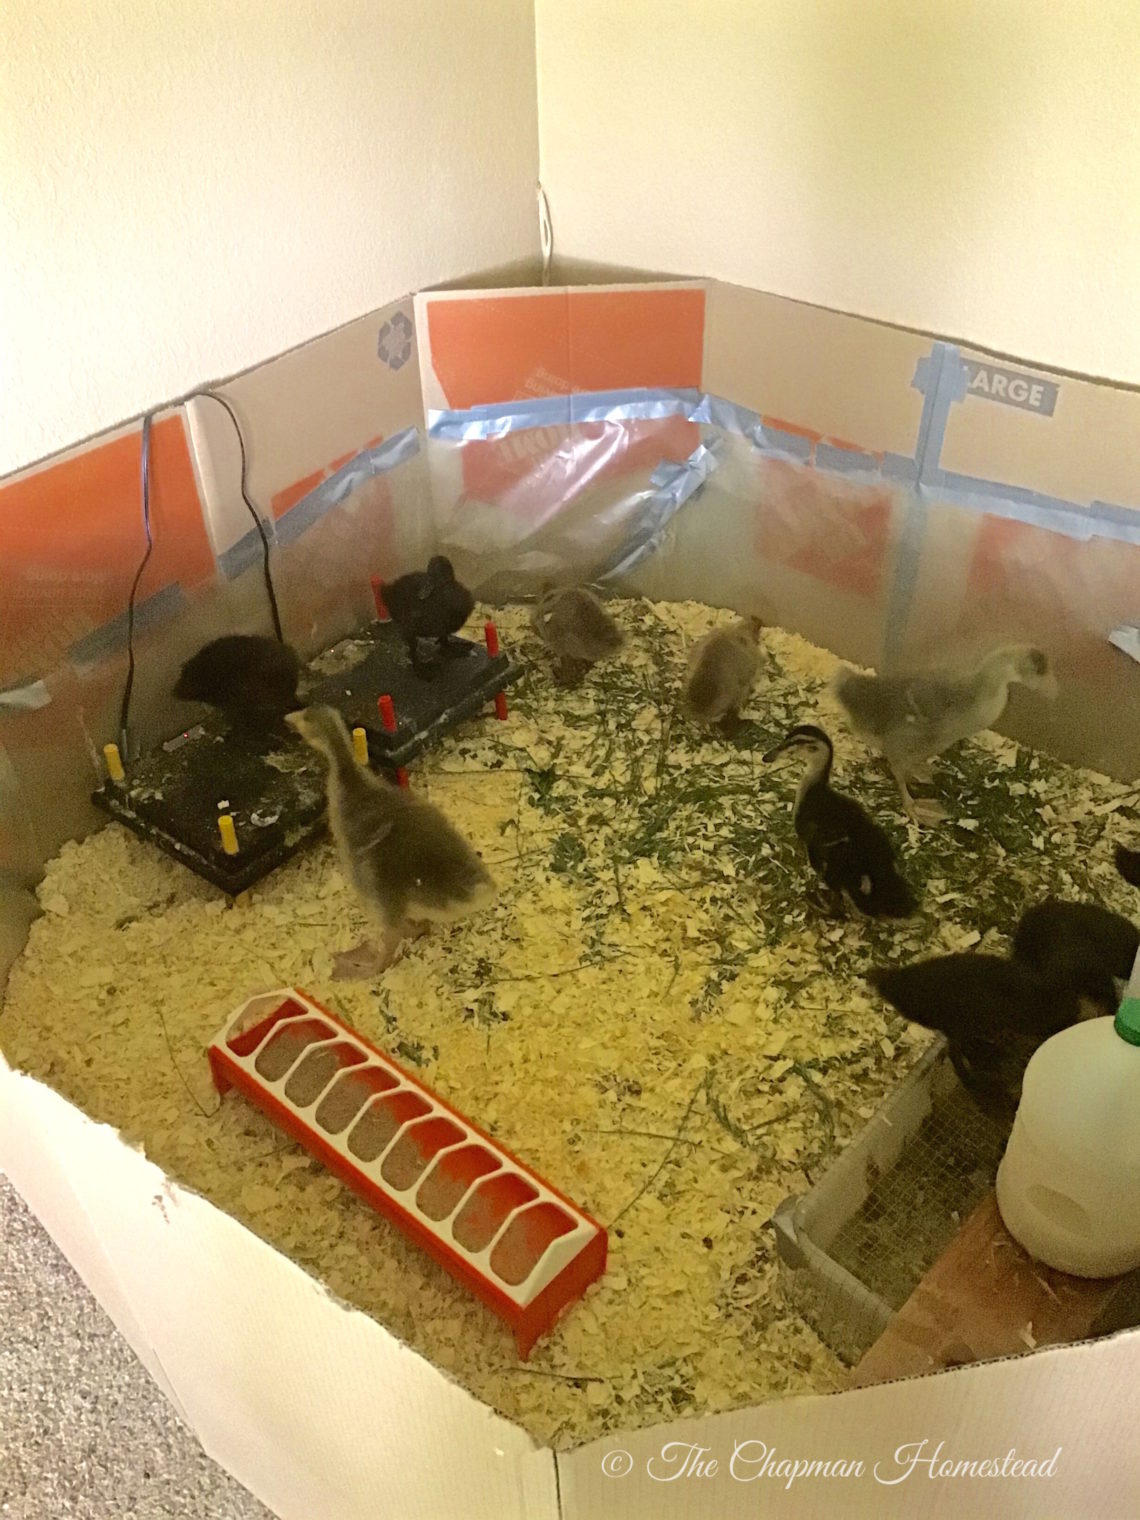
Now that you’ve decided on which type of bedding to use and filled your brooder, it’s time to choose food and water containers.
These containers can be as simple or complex as you want. The most important thing to keep in mind is what type of fowl you are brooding. For example, baby chicks climb and perch on EVERYTHING, so it is important to make sure they cannot tip their food and water containers over. Waterfowl, like their name suggests, LOVE to play in their water, so you will need a water container that keeps your baby birds from getting too wet or drowning.
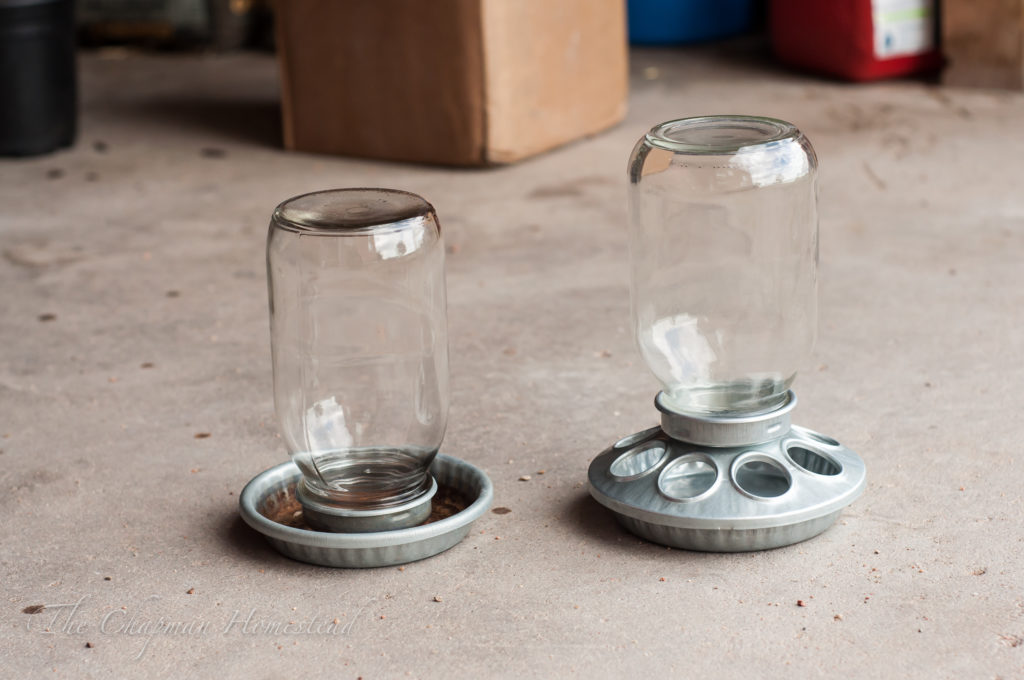
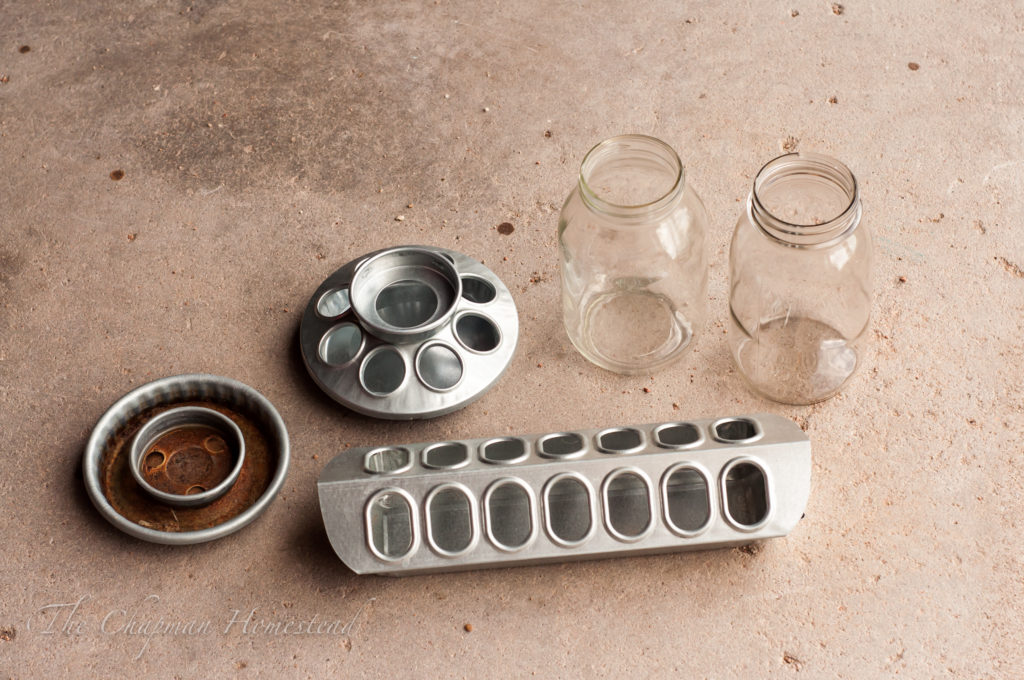
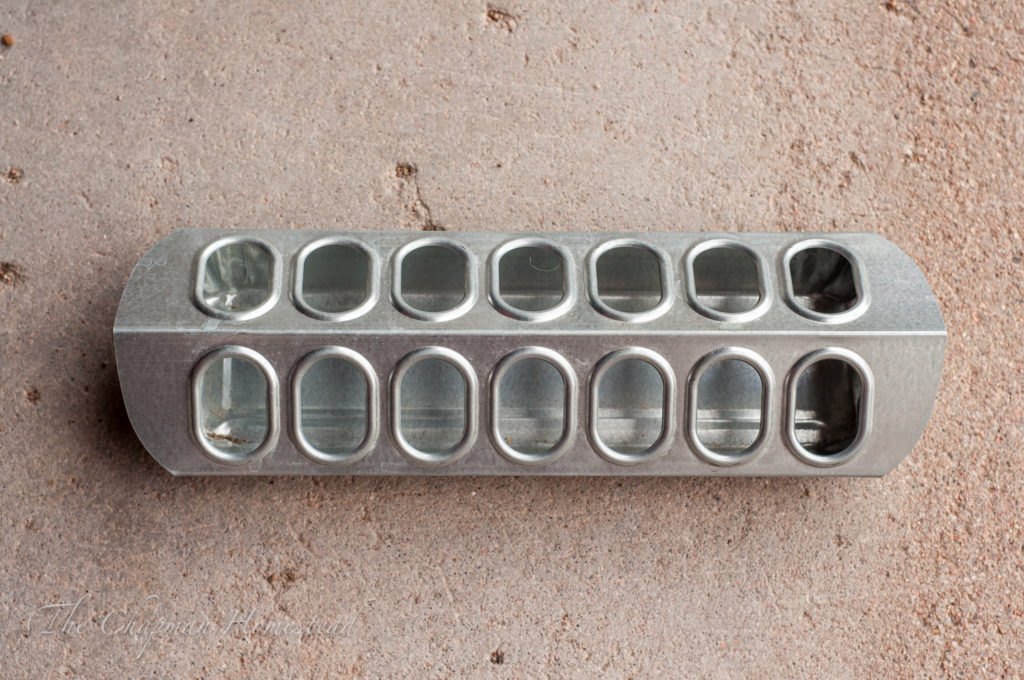
For brooding baby chicks, I recommend purchasing mason jar attachments for food and water. These work well for the length of time the birds will be in the brooder. Chicken beaks stay relatively small over time, so there’s no need to worry about them growing to big to access their food from these types of feeders.
Ducklings and goslings are less inclined to perch on everything, but they require the ability to fully submerge their beaks and eyes to keep clean. For food, we started out using small cereal bowls, and then when they were big enough, transitioned to a 5 pound trough feeder.
Water for ducklings and goslings is a little tricker. The first week and a half we used a small, chicken feeding trough for water. The holes were small enough they could get their heads in the water, but couldn’t climb inside. We made waterers from gallon jugs once their heads got too big for the trough. (Apparently I forgot to take pictures of these before they went in the recycling, though you can see it in the corner of the top picture.) We tried to use a large, gravity fed type chicken waterer for them, but it made too much of a mess, even sitting on the water catchment tub.
Brooder Heat Source
In order to keep your new baby birds warm, you will need a heat source. Different types of fowl have different heat requirements, and I strongly recommend you research the requirements of the particular birds you are breeding.
Heat Lamps
The most common type of heat source is a heat lamp. They are fairly easy to locate, and tend to be quite affordable.
There are several downsides to heat lamps though. For one, they are quite costly to run as they use a high wattage lightbulb. The biggest downside, however, is the fire risk. Straw and pine shavings are extremely flammable, and if your heating lamp were to fall, there’s a chance it will catch on fire. At best, you might just loose your birds, at worse you might loose your entire house. Not the kind of risks I’m willing to take!
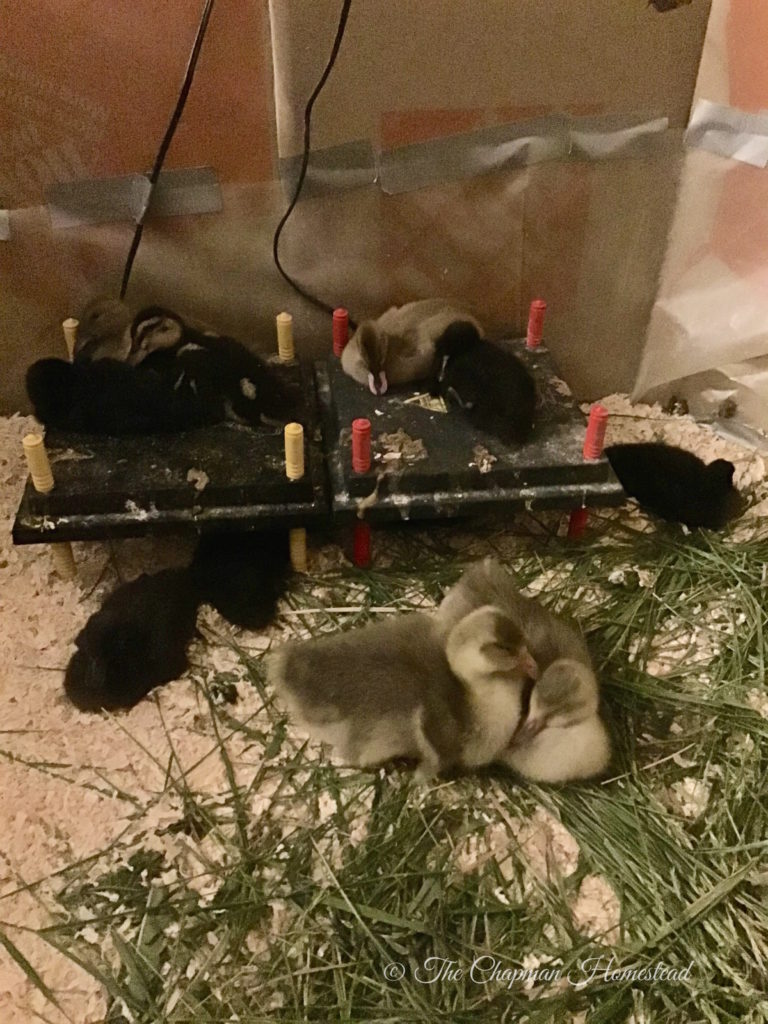
Enter the brooder plate.
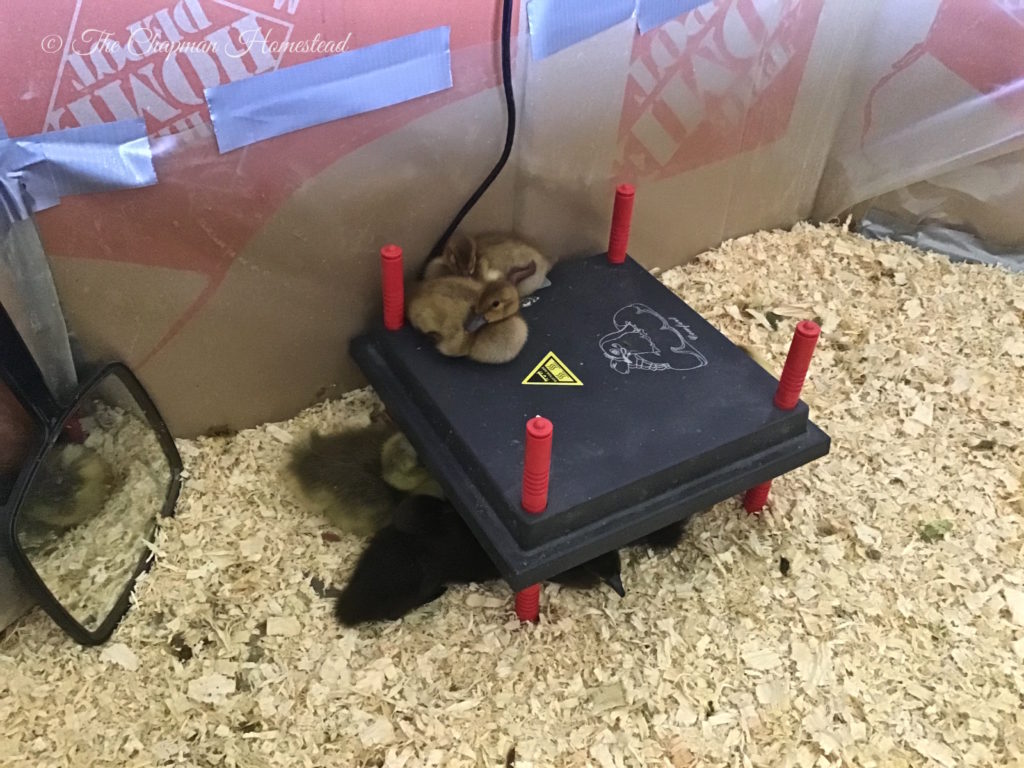
A brooder plate keeps chicks warm in the same way a broody hen does. It has a metal plate on the bottom that chicks can huddle underneath. There are legs that raise and lower so that you can set the optimal height as your chicks grow. When using a brooding plate, it is important to make sure that the baby birds can easily get under the plate while still being able to tough the warming unit with their backs.
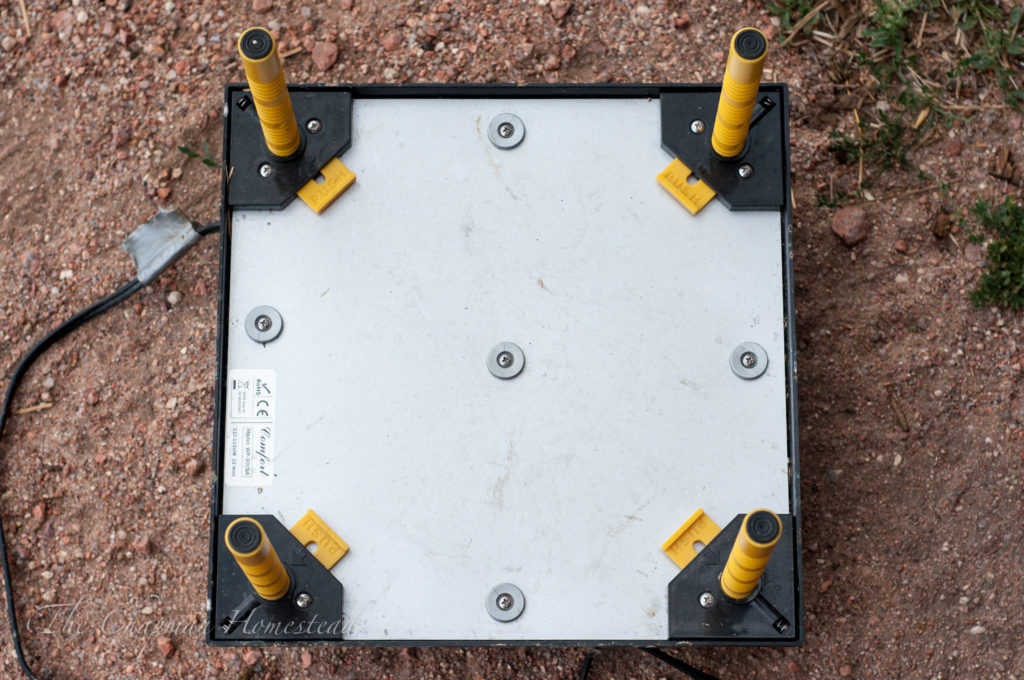
We used a brooding plate for both our chickens and our water fowl and loved it. They are reportedly cheaper to run and not considered a fire risk. The one downside is they are an investment. The yellow-legged brooder we got for $51 at Primer One Supplies, and the red-legged brooder was 54.95 on Amazon. (Neither are affiliate links. They’re just good products that I have used and would recommend. I make no money if you purchase anything from these links.)
One 12 x 12 plate was more than enough for our six chickens. However, we did end up purchasing a second to have enough space for the 12 waterfowl.
Now your brooder is ready for baby birds! You can find chicks at your local feed store, or, if you are looking for more specific breeds or types, you can try an online hatchery. We got our chicks at Big R, and ordered our ducklings and goslings from McMurray Hatchery online. You may also be able to find a local hatchery in your area.
Other Posts in Series
Our Decision to Get Ducks (and Geese)
DIY Duck Brooder Water Solution
DIY Duckling, Gosling, or Chick Brooder


You May Also Like

5 Easy Ways to Care for Your Backyard Flock This Winter

Our Decision to get Ducks (and Geese)
